Odroid HC4 - Perfect budget NAS?
Preface
It is middle of may, and central Europe is getting pretty hot, especially when you live in the topmost floor in a classic European city neighbourhood. As you might know, my NAS is currently pretty powerful machine, running quite a few services that.. I don’t really use. Except file sharing, piHole and ocassional Jellyfin streaming, most of the services are left turned off. So the server just draws a lot of power, creates heat and noise. And on top of all that, due to recent events in the world, electricity is getting pretty expensive. So I have decided to move my server into work’s rack, and buy myself a dedicated NAS solution.
Of course, stuff like QNAP or Synology were first choices, but after discovering their price and “closedness” of software, I quickly discarded it. After some time, I was slowly thinking about buying a small desktop PC like Lenovo ThinkCentre or some HP EliteDesk/ProLiant, just for storage solution. But then, I’ve stumbled accross Odroid HC-4, which offered everything I’ve wanted - decent CPU, dedicated SATA connectors (no adapters necessary), open source hardware and software, low price, and obviously - a Linux support. So I decided to blindly shot my shot, and ordered one from RPiShop (Czech, unfortunately not sponsored).
Setting up
Unboxing, hardware overview
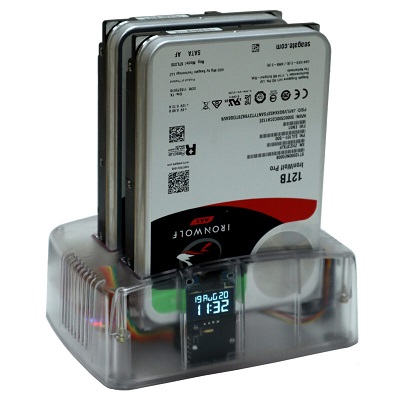
The device itself looks like a toaster, which I kinda like. It does not come with anything by default, except cardboard package, plastic cover and device itself. Power adapter had to be ordered as extra (around 10$), and unfortunately, it does not have Type-C PD (which it would be cool if it had, since it needs 15V/4A adapter).
SoC cooling
SoC has a small heatsink on it, which I thought would be enough by itself to cool it. Turns out it’s not. There is a fan in the case, that draws fresh air into the case, and.. blows around the SoC? Yes, for some reason, the SoC heatsink was installed 90° to the fan, so there is basically no airflow around the fins. Unfortunately, the mounting holes are not square, so you cannot rotate it. Oh well.
The fan itself is not extremely loud. It goes to around 4000RPM, which for 40mm fan is decent, and it does not whine. You can hear the air getting moved, and a bit of bearing when on full tilt, and it might get annoying, especially if you try to sleep next to it. Fortunately, it is a PWM fan, which can be controlled with pwmconfig. At around 2000RPM, it moves noticeable amount of air while being still decently silent, and colling the SoC to nice and comfy 60°C (27°C being ambient in my room, ugh). But I will in near future replace this fan with Noctua’s NF-A4x10 5V PWM, which is around 5dB quieter. Unfortunately, due to the contruction of the case, you cannot fit 20mm thick fan, which sucks, because the NF-14x20 is much more quieter.
Drive bays
The drive bays have SATA connector on board, so you just insert the drives, and done. Unfortunately, 3.5” drives flops around in it, which is not ideal, but then again, casting a mold with such tolerances would be pretty expensive. As a quick, dirty and cheap solution, I stuck a piece of cardboard between the drie and one of the walls. I absolutely would NOT recommend mounting 2.5” HDD into the bays, since they flop around like crazy. SSDs should be fine for obvious reasons.
Only thing that worries me is the cooling of the drives, or rather, the lack of it. But that might be solved with some 3D printed (or machined) holders for a fan, that will just blow freash air around the drives. Just sitting on table, doing nothing, the drives reached around 50°C easily (with 27°C ambient), which is.. honestly not bad, but definately not ideal.
Power
As I’ve mentioned, the toaster is powered with 15V adapter, with recommended 4A of current. Which seems quite a lot for me, since according to Hardkernel’s website, the system should draw around 16W in full load with 2 Seagate Barracuda HDDs. It uses standard barrel plug, which is at least better than some proprietary damned connector. Getting a power supply was easy, and costed only around 10$. I would love to see USB Type-C plug on the next iteration, with 12V 3A power delivery capability.
Connectivity
Connectivity is extremely barebones, which you would expect for a NAS. There is already mentioned barrel plug on the front, a microSD card slot next to it, a USB 2.0 type A port for keyboard or WiFi adapter, HDMI and a full gigabit ethernet plug. For some reason, only HDMI has label that says HDMI. But the cutouts are nice, and all cables I’ve tested fits well. Oh, and there are two SATA ports with power located on top of the case, for your drives.
Installing OS
Petitboot
The board comes with Petitboot, which on paper seems like an extremely cool thing. It is a simple bootloader, that is pre-installed on board. You are supposed to boot the thing without SD card, type some stuff into the shell, insert the SD card and the bootloader will download the OS installer, boot into it and then manages your OS installations. Yes, you apparently, can have multiple of them. As for why would you do that, I have no clue, but you can.
So I’ve booted into Petitboot, typed netboot_default into the shell, and I was greeted by a menu where I could choose which OS I wanted to install. I went with Debian 11, since later on, I wanted to install OpenMediaVault, because apparently, my beloved TrueNAS is not supported. After pressing enter, my screen went black and stayed like that. After few reboots, I found out I have to turn off and on my monitor (unplugging the HDMI wasn’t enough). After that, I was in Debian setup. Not perfectly painless, but still, might be my monitor. So I went and configured everything, and then.. no drives found. For some reason, the setup could not find the SD card I had in the system. I tried reinserting it, rebooting, Debian 10, Ubuntu 22.04, 20.04, none of them could see the SD card. At that point, I was suspecting that the Petitboot might be doing something with the SD card, preventing the installer from seeing it. So it was time to ditch the automatic install, and do it the old way.
Armbian
Except that the only oficially supported OSs are Android and Ubuntu, none of which is supported by OpenMediaVault. So after a bit of googling, most of the discussions were suggesting installing Armbian, which is a Debian but ported for ARM CPUs. The Odroid HC4 was on the list of officially supported boards, with the most recent Debian and Linux kernel. Neat. So I flashed that onto SD card, and found out that I have to bypass the Petitboot, because of some compatibility issues. Fortunately, there are 2 simple ways to do that; either hold down a button that is located on the bottom of the board, which bypasses the bootloader and forces boot directly from the SD card, or to boot into Petitboot and erase the SPI flash, where it’s located. After deleting the bootloader, inserting the card into board, I was greeted with Armbian’s setup screen. Installation was easy, even simpler that Ubuntu, which is a lot to say. After that was done, I did the classic apt update && apt upgrade, changed passwords, imported SSH keys and installed fancontrol. After fiddling with that for a bit, I downloaded and run the OMV setup script. Installing that took a solid 20 minutes, since it had to download a lot of additional packages, and the PHP scripts were slow as hell. But eventually, everything was done with 0 errors, so I logged into the dashboard and.. yea, that’s pretty much it.
Configuring OMV
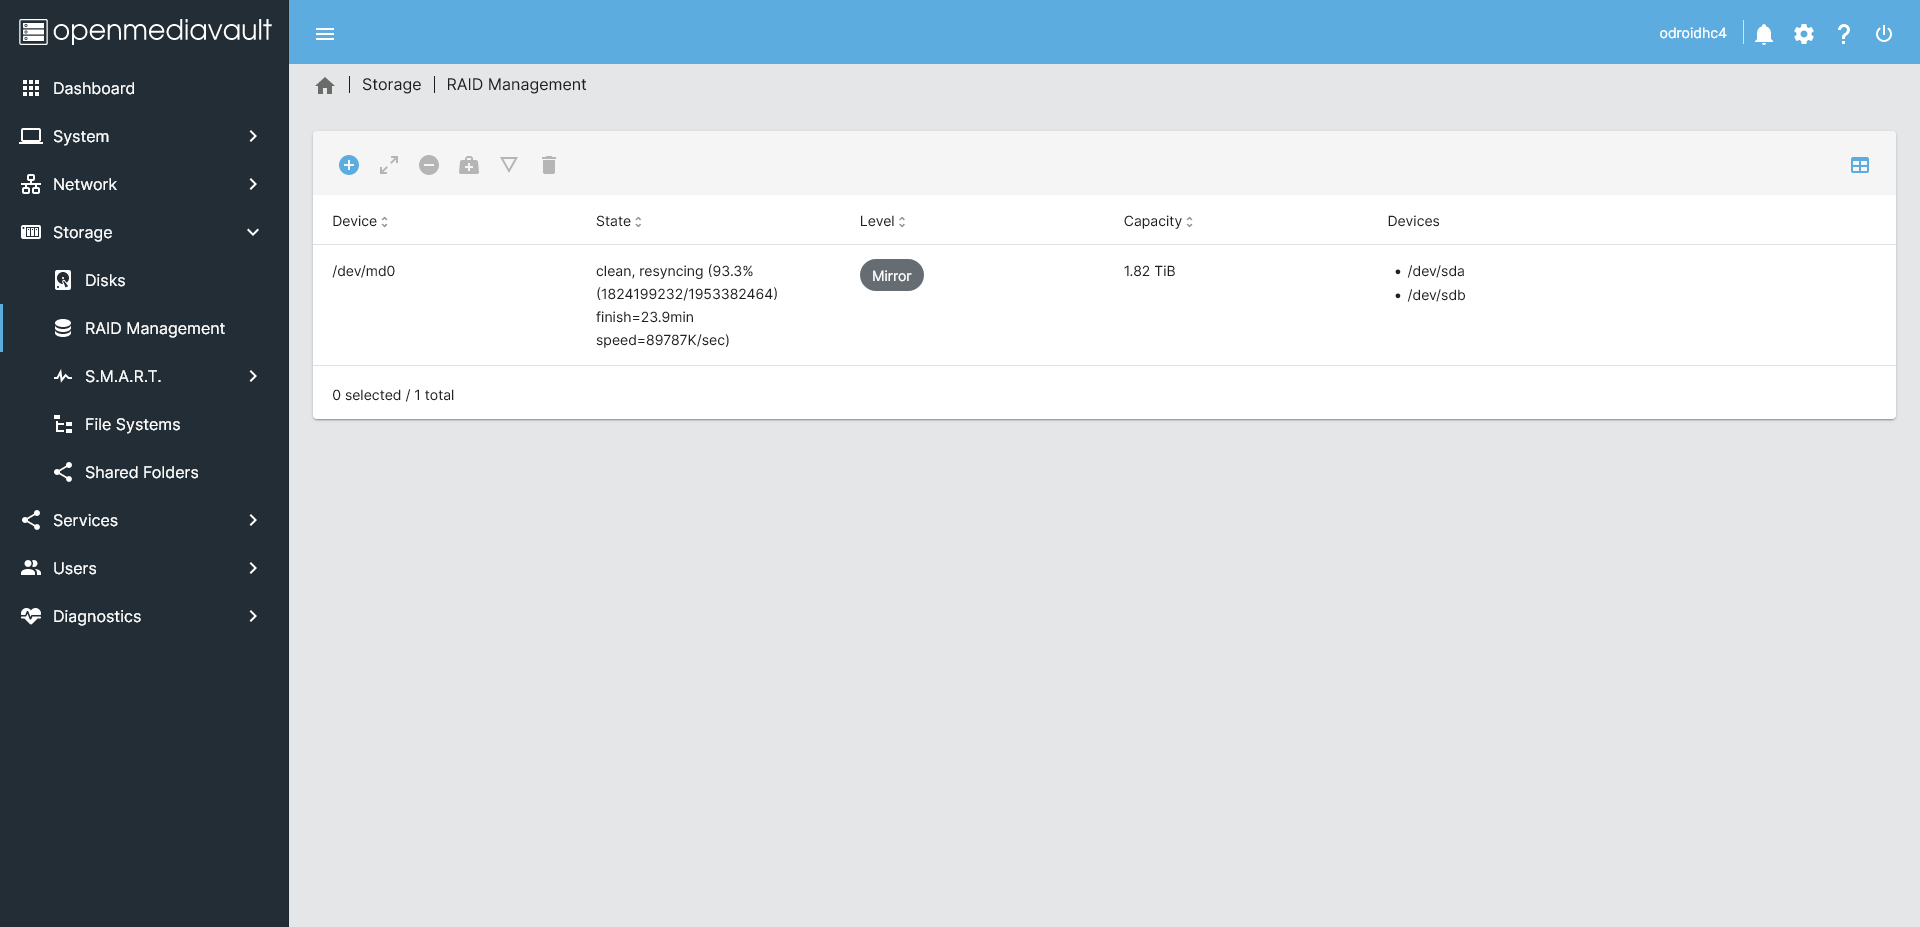
At this point I still hadn’t inserted any drives into the bays, because.. one step at a time. After I was sure that OMV was working, static IP was set and I powered it down and inserted the drives. They are a pair or Seagate Barracuda ST2000DM001, that I got for free. Both had over 60000 power on hours, so they are probably some throw-aways from some datacentre. Anyway, one of them had few bad sectors, but since I was planning on running them in RAID0, and eventually replacing with higher capacity (4TB HDD is like 100$, crazy), it’s not much of a problem. System picked up both drives straight away, as awell as OMV, which was excellent. So I created a new software RAID0 and went on to install filesystem.
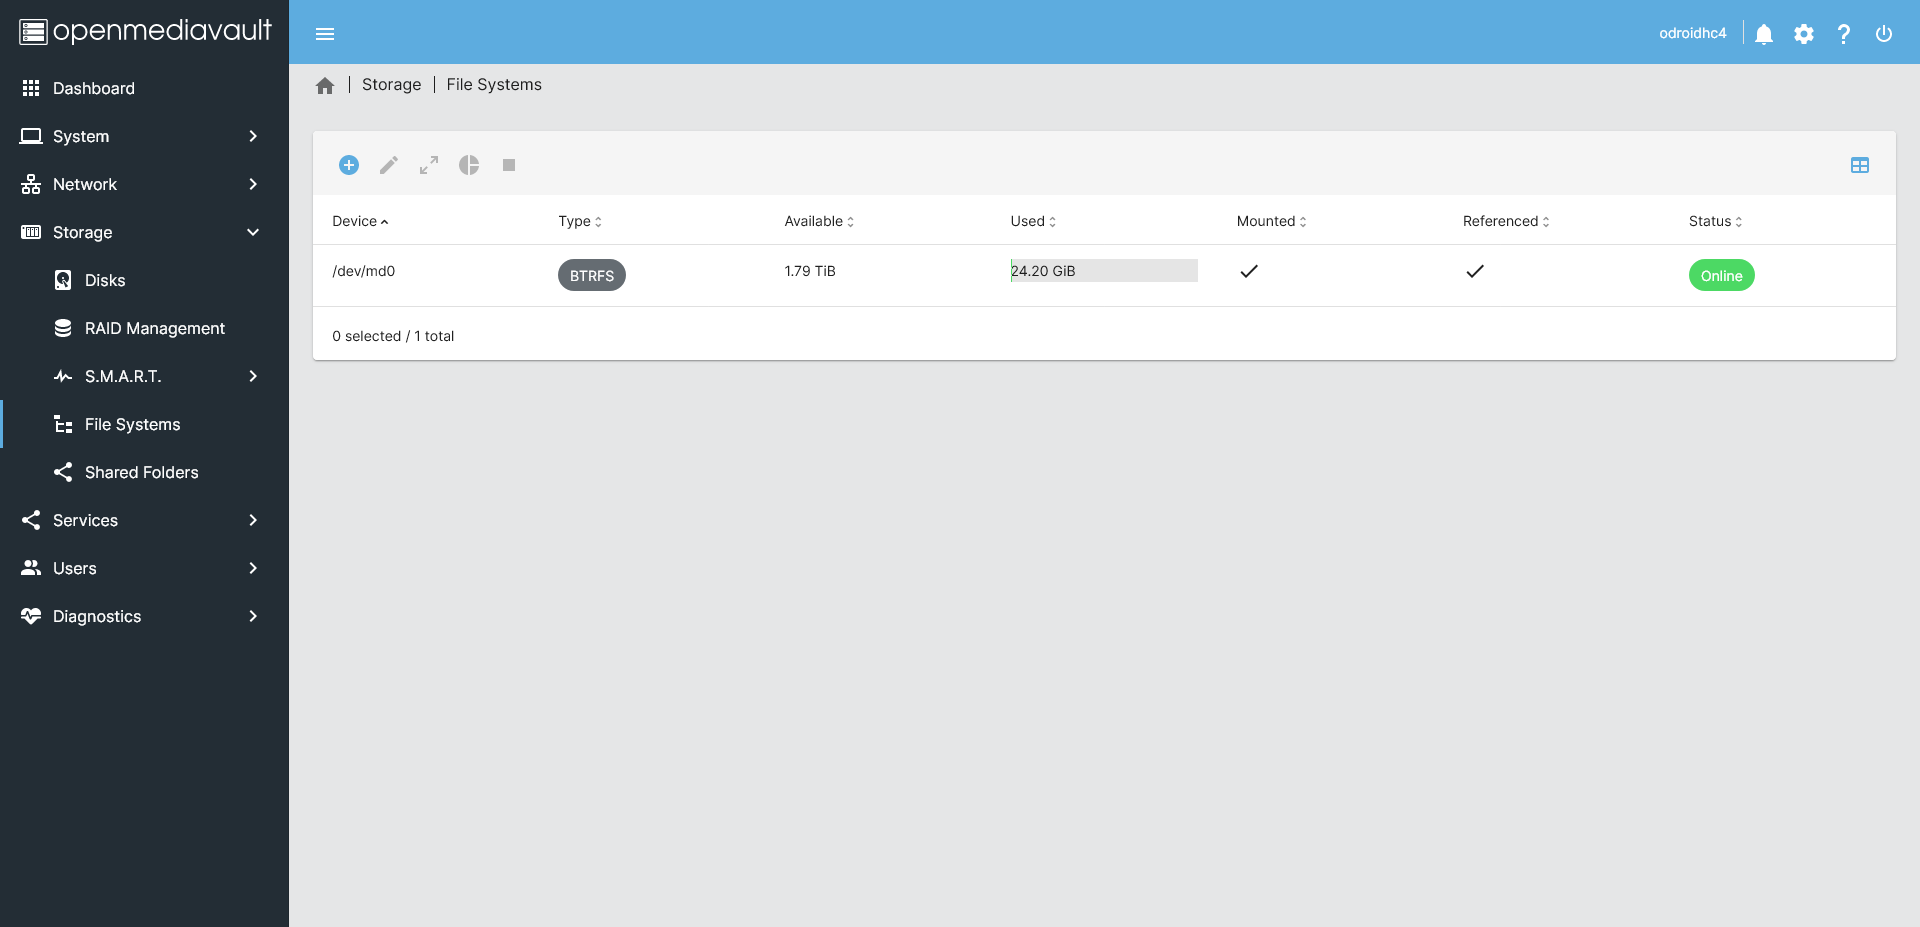
One reason I love TrueNAS so much if ZFS. It is so easy to use, makes so much sense, and it’s extremely powerful. Unfortunately, OMV does not support ZFS out of the box, and last time I installed the ZFS plugin (in OMV 4), it bricked the entire NAS and I lost a lot of data. Not trying my luck today, I skipped ZFS entirely and went for BTRFS. And yes, I know the history of it, that it was buggy and not reliable, but recently it started to pick up some positive traction, so I figured I’d give it a shot. After fs formatting was done, I set up a network share, enabled SAMBA and connected to the NAS. Everything worked first try, which was neat, the config was a lot simpler that on TrueNAS, but also offers a lot less to configure. But still, for something this cheap, easy to install, I cannot really complain.
Performance
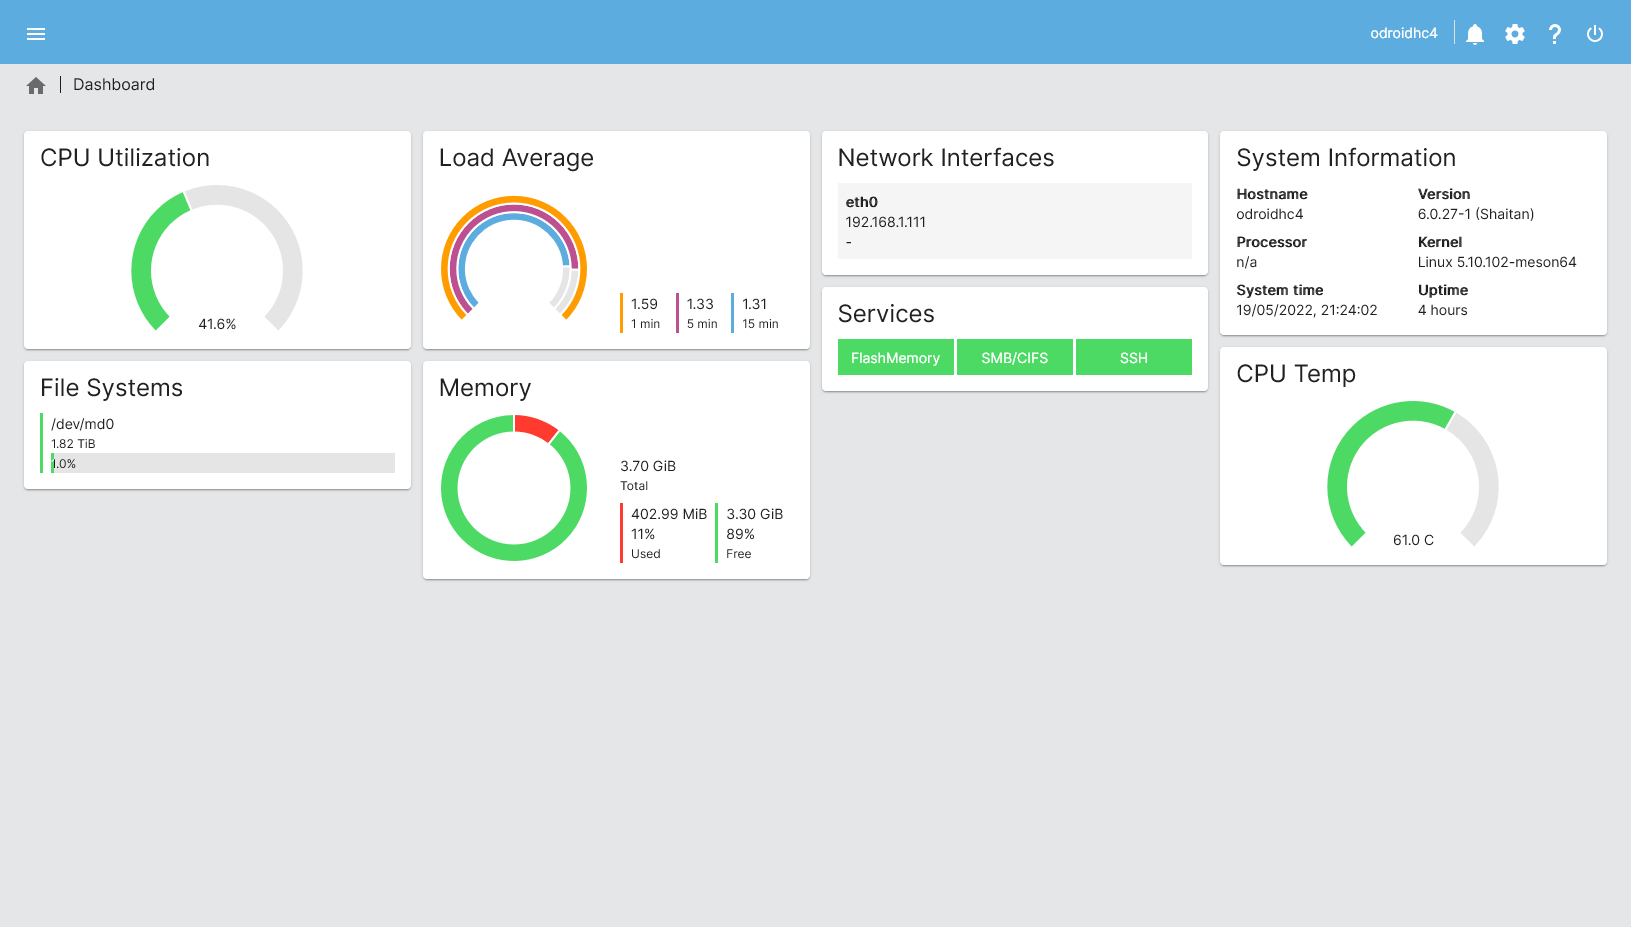
This data might be a bit misleading, since the RAID is still “syncing”, and thus a degraded performance is expected. What was not expected was that, besides RAID still syncing, I was able to saturage 1Gpbs connection, the speed stayed pinned at full gigabit, and CPU usage was only around 40-50%. I tried transferring a 4GB movie Linux ISO, 18GB zipped game, and various benchmarks.
SMB, files
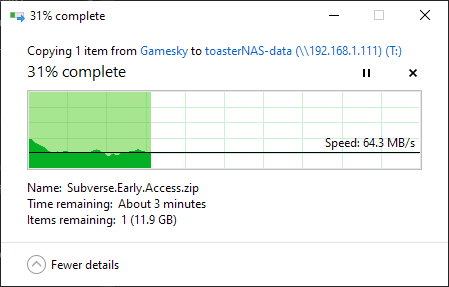
The first transfer did some weird stuff, as you can see on the image below. For some reason, it went full speed, dipped to around 20Mbps, then went up again, dipped, rinse and repeat. I have no idea why that happend, and haven’t observed such behaviour later on. However I’d still figured out it’s worth mentioning.

This is a transfer of 18GB zipped game. This is what I was talking about, while resilvering the RAID, it didn’t reached full speed. But still, for a 100$ device, even if this would be the top speed, I wouldn’t complain, since nobody does any heavy work off the NAS.
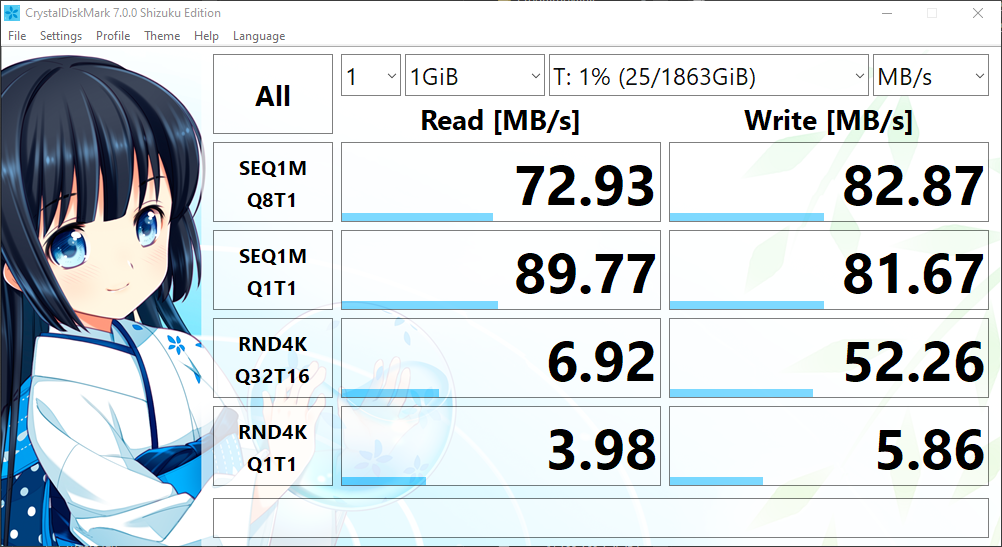
Crystaldiskmark
Again, results are a bit skewed, but still very decent. It is what’s to be expected from a gigabit connection and two almost dead hard drives.
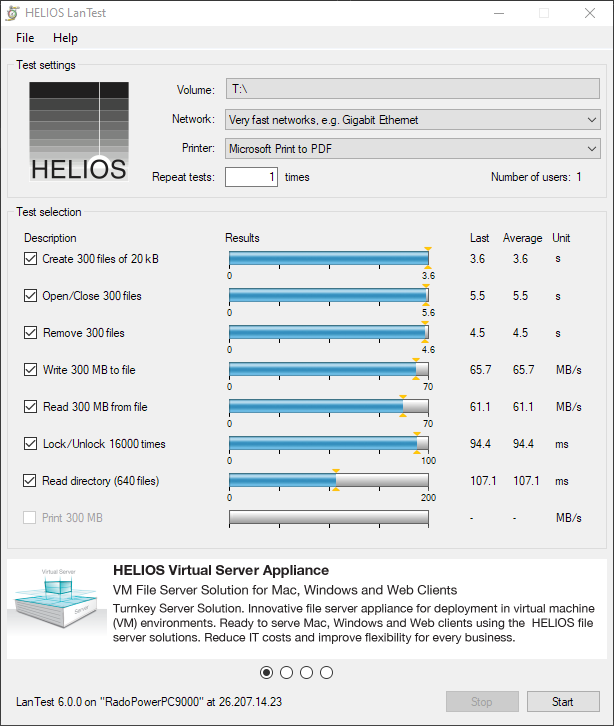
HELIOS LanTest
Apparently pretty popular in enterprise. Tried it, got results that are better than what’s on Hardkernel’s webssite, so happy.
hdparm
Benchmark running directly on device shows around 105MiB/s, which is pretty decent, but a bit slower than expected. This was a benchmark of the full RAID mount. With new drives, I expect it to be around 200MiB/s, but given that my drives are basically walking corpses, it’s decent.

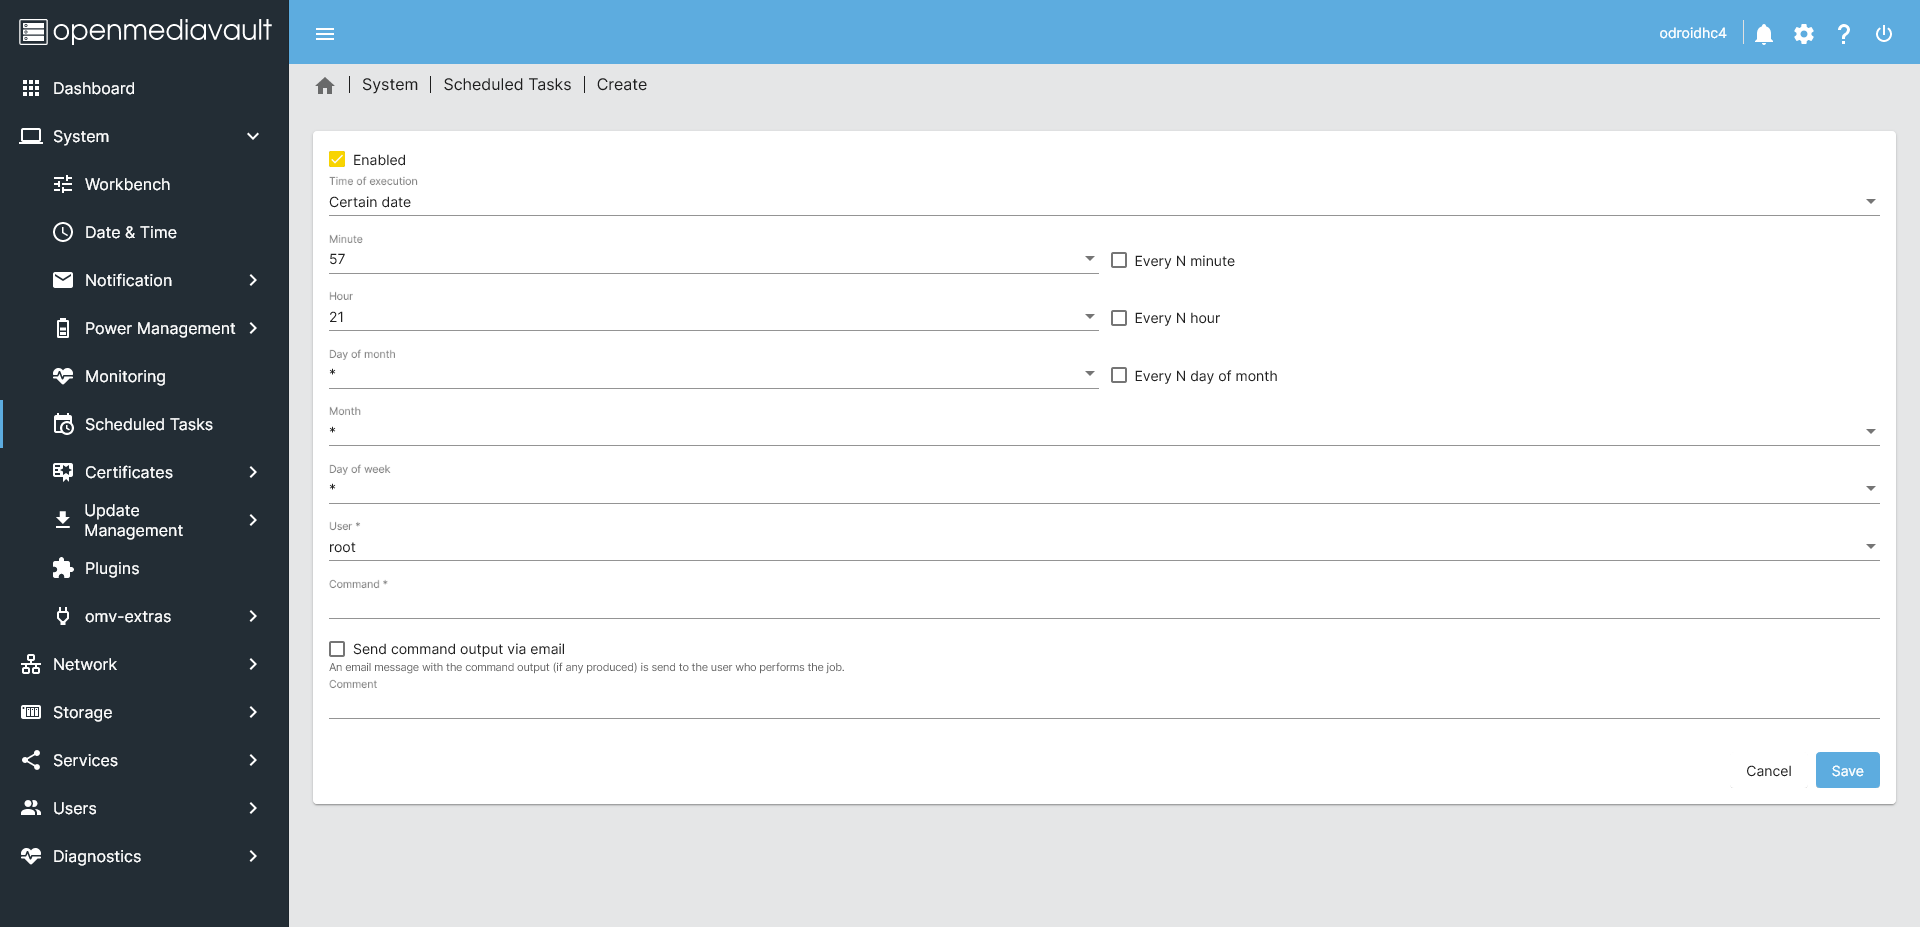
Screenshots
Here are some screenshots from OMV 5. It looks very nice, polished and much better than v4 I remember. I really like the dashboard, and CPU temp plugin. As you can see, temps are under control, despite the heatsink’s fins are basically useless. Hopefully, the engineers will flip the heatsink around, and I expect it might lower the temps by solid 3-5°C at least. 4GB of memory is so far enough, and I understand how this might be a big issue with ZFS, since it is extremely RAM hungry.
Conclusion
For 73$, it’s absolutely a beautiful piece of hardware. Except Petitboot, everything “just works(tm)”, everything was smooth and there are minor annoyances and stuff that might be worrysome.. I mean they are minor, but they definately exists. I would strongly recommend it, if you are in need of a network attached backup device, low-use storage or even for small businesses to share their documents, invoices and some light document work. Of course, it requires some configuration, manual digging and knowledge of Linux, but if you prefer having complete control over your hardware for giving up some of that ease of use, it’s totally worth it.
At the end, I cannot forget the usual “RAID is not a backup” and “don’t forget you’re running your entire OS from an SD card”, so have a proper 3-2-1 (or at least 2-2-1) backup scheme, and choose a high quality SD card.